Friday 5 September 2014

Thank You Notes


Here are some thank you tags that I made for some very special people! :)

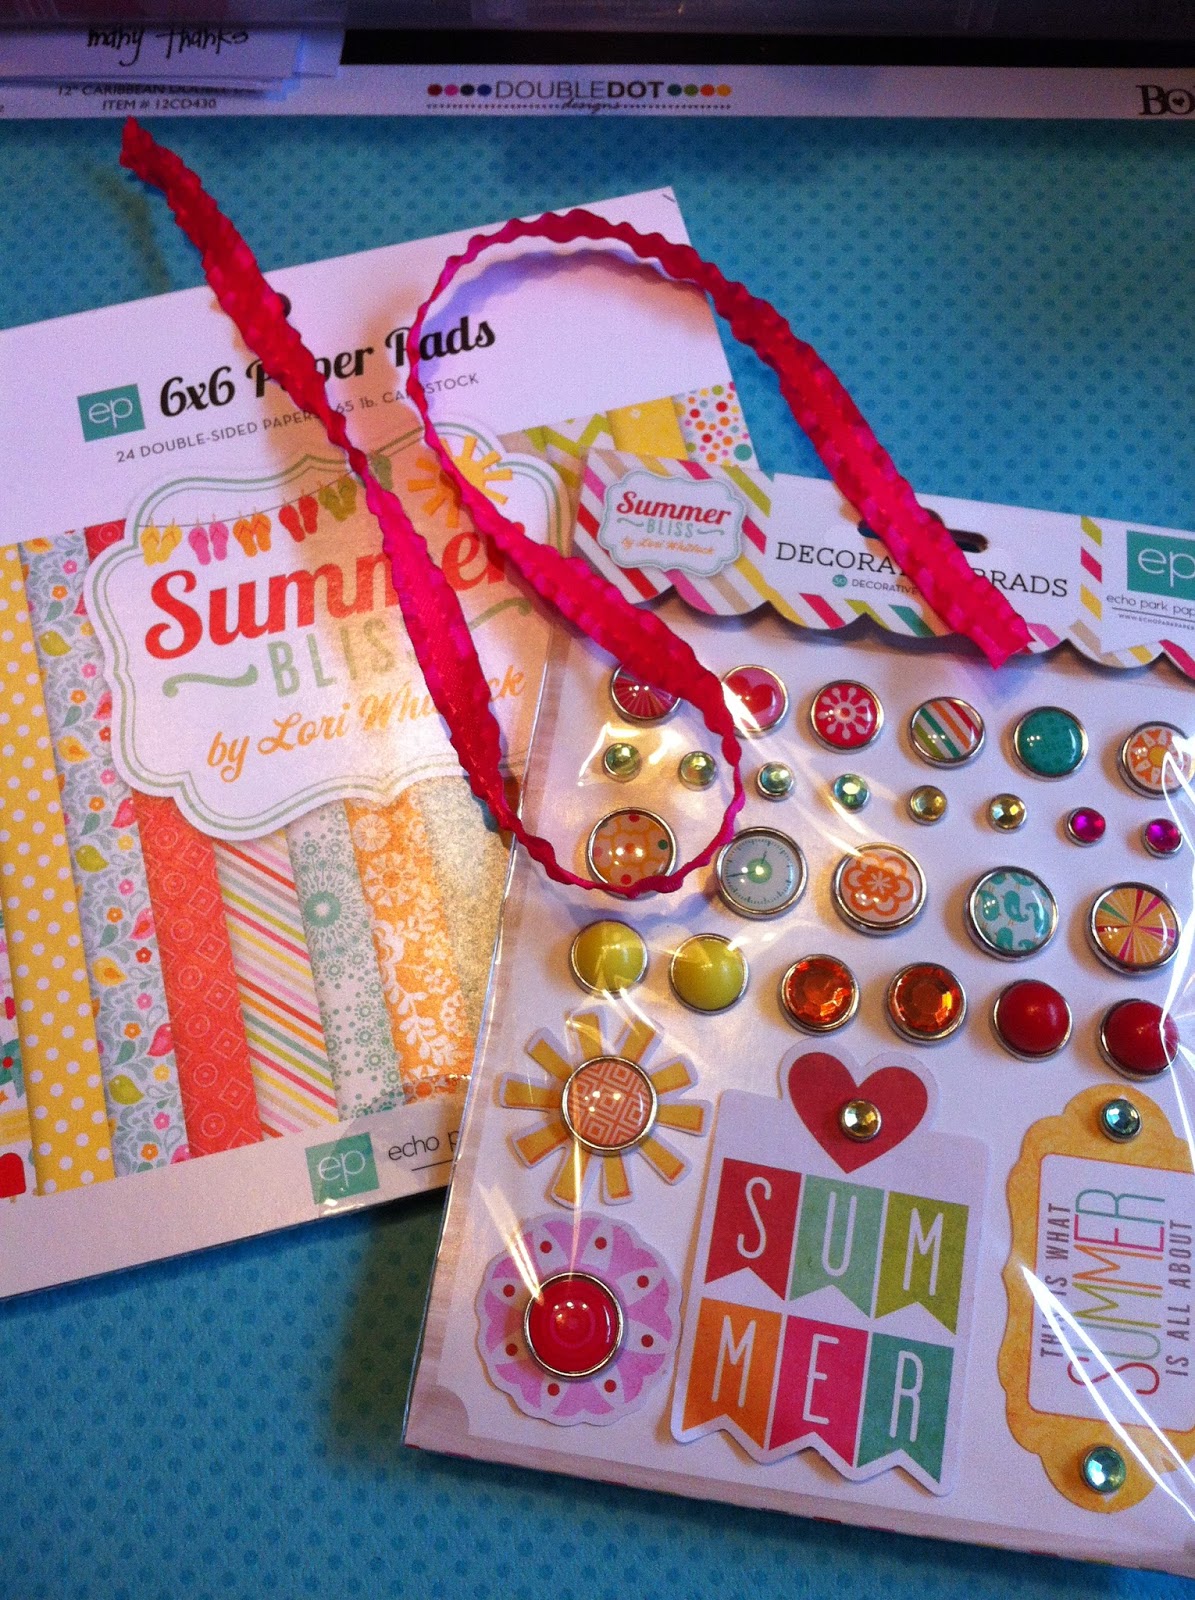
I started with just one piece of Pumpkin Double Dot Cardstock and cut it into 8 pieces (6"x3"),and from the Echo Park Summer Bliss 6x6 Paper Pad, I cut 4 of the 6x6 patterned papers to 5 3/4"x2 3/4", getting 2 of this size from each 6x6 paper.

I then cut some plain white cardstock into (8) 1 1/2"x3" and one more 6x6 patterned paper to make (8) 1 1/4"x3".
I layered the small pattered paper pieces over the white cardstock and lined up the 3" edges.
Then I cut (8) 3/4"x2 1/2" pieces from white cardstock for the "Many Thanks" banners.


Then using a glue dot (zots) to hold my first knot for my "bow", I wrapped a length of ribbon (ribbon from my stash) around my fingers a few times to create a "layered" bow.


I put the ribbon layers over top of my first knot and used the knot tails to tie around the ribbon layers to hold them. (you can always use another glue dot to hold that knot so it is less likely to undo)


And here you have a "layered' bow!


Now, I really like layers on my projects so I used foam squares on the main patterned paper to pop it up, in addition to the smaller layer.


I then layered the main patterned paper onto the orange cardstock, and the smaller mat on top of that, just under the bow.


I took the sentiment from the Bloom Beautifully Stamp set (coming soon), and stamped it onto the white cardstock (3/4"x2 1/2"), leaving some space on either end to add a decorative brad and banner end.


An easy way to make a banner end, is to cut down the center of the paper where you want the cutout, and then cut from each corner to the center of the banner.


I then pierced a hole for the brad in the center between the left side of the banner and where the sentiments begins, inserted the brad and bent back it's prongs.


And then again using foam squares for dimension, I adhered the banner to the small mat on the front of the tag.


So there you have it! With a small amount of supplies, I was able to make 8 Thank You Tags for some very special people! ;)
Hope you like the tags and hope they bring you inspiration!!!

Products used:
http://www.prairiepaperhaven.com/products/bobunny-double-dot-double-sided-textured-cardstock-12x12-pumpkin

http://www.prairiepaperhaven.com/products/summer-bliss-cardstock-pad-6-x6-24-sheets

http://www.prairiepaperhaven.com/products/summer-bliss-decorative-brads

http://www.prairiepaperhaven.com/products/3d-foam-squares-white-variety

Monday 15 April 2013

This card is one that I created for my dear sweet Mom for her birthday. I ordered some supplies (paper roses/seam binding ribbon/etc) from Wild Orchid Crafts and I absolutely love them and am having a lot of fun using their products. The paper used for this card and the following other two cards is from Close to my Heart.


This next card was for my Auntie (who just so happens to be my mom's twin sister). These flowers however were from Kaisercraft and Wild Orchid Crafts. The pearl stems were from the dollar store, it was a large spray and I just clipped it apart to use as extra sparkle. The lace is just some that I had in my stash, and the seam binding is from Stampin' Up.


This last card is one that I created for the lady running the Facebook group I am a part of. I found out that her birthday was coming up and sent her a card for her special day.
The roses are again, are from Wild Orchid Crafts and the lace trim is from Webster's Pages. The paper is from Close to my Heart.


Before I go, I have one more card to share with you. This is one I created for a friend of mine for her birthday.


I am having a lot of fun creating lately, starting to work outside my comfort zone, and trying new things. Some of the cards using these new paper flowers are similar, but I've tried to make everyone's card unique.

I have a few more projects on the go, so am looking forward to posting those soon.
Well it's been a little while since my last blog post...Life is busy as usual but I've managed to work on a few projects in the past little while.

This first project is an album that I created for a friend of mine, she was giving it as a baby gift, so had to wait until the recipient received it before I could post the video.


This next video is a more recent project that I created for my mother-in-law's birthday. It was created using a wood bird feeder that I got at the dollar store. I used the Prima Sun Kiss paper collection, as well as some of the paper flowers/posies from the same collection.
I was inspired to create the altered bird feeder from a YouTube video by Leanne (Luvleescrapin), and this was my take on it. I really like the way that it turned out.


I also created a card for my mother-in-law for her special day using the same paper pack as the bird feeder (Prima - Sun Kiss)


Since the beginning of the new year I have been trying to keep up with sending a card to everyone in my calendar, and I have been keeping up quite well. These are a few additional cards that I have created for some special people in my life.

These are a couple of tags that I created for a workshop. Both use Close to my Heart products.


This next project is an "Altered Easter Basket" exchange that I took part in. The basket started out plain, with no embellishments on it, just the blue, pink, and green around the basket. I dyed some seam binding ribbon in blue, pink, and green to tie/weave around the top of the basket, and added various flowers to match. The small ones that are on the handle I punched out and assembled 3 layers, then painted with glitter glue for a bit of sparkle, and added some half-back pearls along the handle as well.


This is the card I created to go along with the Easter basket.


I filled the basket with various ribbons and goodies for my exchange partner to enjoy for Easter.


Friday 28 September 2012

Close to my Heart Organizers

These are the new organizers available from Close to my Heart. You can order them at ctmh.com/jganshorn

Saturday 4 August 2012

My First Challenge!


Wild Orchid Crafts (Round in circles) and Lili of the Valley (Anything but a card...) both have blog challenges going on right now and I decided to give it a try. So this is the first challenge that I have entered, hope it works out.

This is a banner for my daughter, Isabelle's bedroom. The frame is cut from chipboard using the Close to my Heart Art Philosophy Cricut cartridge, as well as the polka dot paper (also from CTMH) I used to cover it. The striped paper and the cardstock used for the images' circles is also from CTMH. The flowers and pearl trim are from Wild Orchid Crafts, and the image is from Lili of the Valley. I colored the image with copic markers (still learning) and then used my 2-way glue pen to adhere some glitter to the butterfly. The box-pleated hot pink trim is from Webster's pages and the pink ribbon hanger and mesh butterflies are from the dollarstore. The alpha's I used were just from my stash.

I really hope you enjoy it. It was fun to create.

Thursday 26 July 2012


So 37 years ago my parents got married and today they are celebrating their anniversary. I wanted to make them a card that would reflect their special day...

I used their wedding colors which were light pink and light blue, I also wanted to make it look a bit worn as they were married quite some time ago, and have been through a lot together.

I really hope they enjoy this card made especially for their special day!

Love you Mom and Dad!

About the card:
This card is 5x7, I used Close to my Heart "Bliss" patterned paper, and Colonial White and Daisy White cardstock. Stamps used are also from CTMH.
The lace is from Webster's pages.
The flat back pearls and pink roses are from Wild Orchid Crafts
The blue roses and leaves are Prima
I cut the stems of the roses off and used them for the little green spiral sprigs.


Then 33 years to the day after my parents were married, my younger brother was married to his love, Natasha. I made them a card as well using their wedding colors, however I did not distress their card as their life together is fresh and new.

I absolutely love to create for specific occasions and make it personal to the recipient. It means so much more that way.

Love you Tyler and Natasha! Best wishes for many more years to come!

About the card:
This card is also 5x7, I the same papers as for my parents card (used Close to my Heart "Bliss" patterned paper, and Colonial White and Daisy White cardstock). Stamps used are also from CTMH.
The red trim is from Webster's pages.
The lace and flat-back pearls are from Wild Orchid Crafts.
The red flower is from Maya Road.
Leaves are from Prima
Sparkles are from Close to my Heart

Hope you enjoy the cards and my bit of sappiness... Thanks for looking!!!

Wednesday 18 July 2012

August is a great month to become a consultant with Close to my Heart! The New Consultant Kit has what you need to start your business right, including a huge supply of Close To My Heart products, all for only $49. You may add more to your kit by purchasing the expanded kit, which includes everything in the $49 plus more tools, products, Studio J® layouts and the like for only $99. Whether you love creativity, community, business, or all three, you are welcome here! Join us and discover all the wonderful rewards of being a Close To My Heart Independent Consultant.
When a new Consultant joins my Close To My Heart team in August they will receive an exclusive Damask Tote Bag for FREE (retail value $50)! This offer has limited availability, so if you are thinking about joining, act quickly to ensure you snatch up this darling tote bag. This offer is good for both the $49 and $99 New Consultant Kits (while supplies last). This awesome, coated-canvas tote that can be slung over the shoulder, across the chest, or worn as a backpack. Offer valid August 1, 2012 – August 31, 2012, so don't delay!!!